快速配置深度学习主机环境的下篇。上篇已经配置好底层驱动和CUDA,可以实现SSH远程登录,使用SAMBA进行文件共享。这篇将完成TensorFlow,Jupyter,PyCharm的安装配置。
Python & TensorFlow
-
安装Conda到
/usr/local/cellers/conda3,默认的python和pip已经替换为Anaconda的版本NOTE:如果你不知道当前运行的Python或pip到底是哪一个什么版本,你可以使用
which python查看。 -
创建虚拟环境:
conda create -n tf_env,进入:source activate tf_env,安装pip:conda install pip -
安装Tensorflow 1.6:
pip install --ignore-installed --upgrade tfBinaryURLwhere
tfBinaryURLis the URL of the TensorFlow Python package. For example, the following command installs the GPU version of TensorFlow for Python 3.6:pip install --ignore-installed --upgrade https://storage.googleapis.com/tensorflow/linux/gpu/tensorflow_gpu-1.6.0-cp36-cp36m-linux_x86_64.whl也可以使用:
pip install tensorflow-gpu
Jupyter
conda install jupyter安装 Jupyter,jupyter notebook --generate-config,编辑生成的文件vi ~/.jupyter/jupyter_notebook_config.py,
   c.NotebookApp.ip = '0.0.0.0'
   c.NotebookApp.port = 8080
   c.NotebookApp.password = u'sha1:c3182135f429:0b593978f9f157b26871b7d2e9c478e4cbb6c556'
   c.NotebookApp.notebook_dir = u'/home/deserts/Projects'
上面的密码这么来的:
   >>> from IPython.lib import passwd
   >>> passwd()
   Enter password:
   Verify password:
   'sha1:7d95d331a799:305429d9f9d799dce42cb8635b770a63d254c419'
- 设置systemd随开机启动,
sudo vi /etc/systemd/system/jupyter.service,这里使用Environment指定PATH和LD_LIBRARY_PATH环境变量,因为systemd不能使用.bashrc中的环境变量。具体参数视情况而定。
   [Unit]
   Description=Jupyter Notebook
   After=network.target
   [Service]
   Type=simple
   Environment=PATH=/usr/local/cuda-9.0/bin:/usr/local/sbin:/usr/local/bin:/usr/sbin:/usr/bin:/sbin:/bin LD_LIBRARY_PATH=/usr/local/cuda-9.0/lib64
   ExecStart=/usr/local/cellers/miniconda3/bin/jupyter notebook  --config=/home/deserts/.jupyter/jupyter_notebook_config.py --no-browser
   User=deserts
   Group=deserts
   WorkingDirectory=/home/deserts/Projects/
   Restart=always
   RestartSec=10
   [Install]
   WantedBy=multi-user.target
多人独立的Jupyter环境只需要用不同的配置文件和Python内核即可。
更好的保证安全参阅:https://bitmingw.com/2017/07/09/run-jupyter-notebook-server/
PyCharm
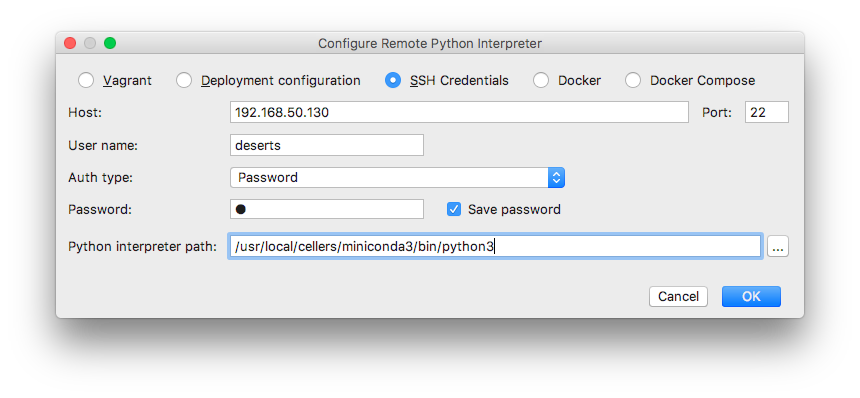
- Interpreter设定:preference -> project -> project interpreter,点击小扳手,add remote,如下图进行配置:
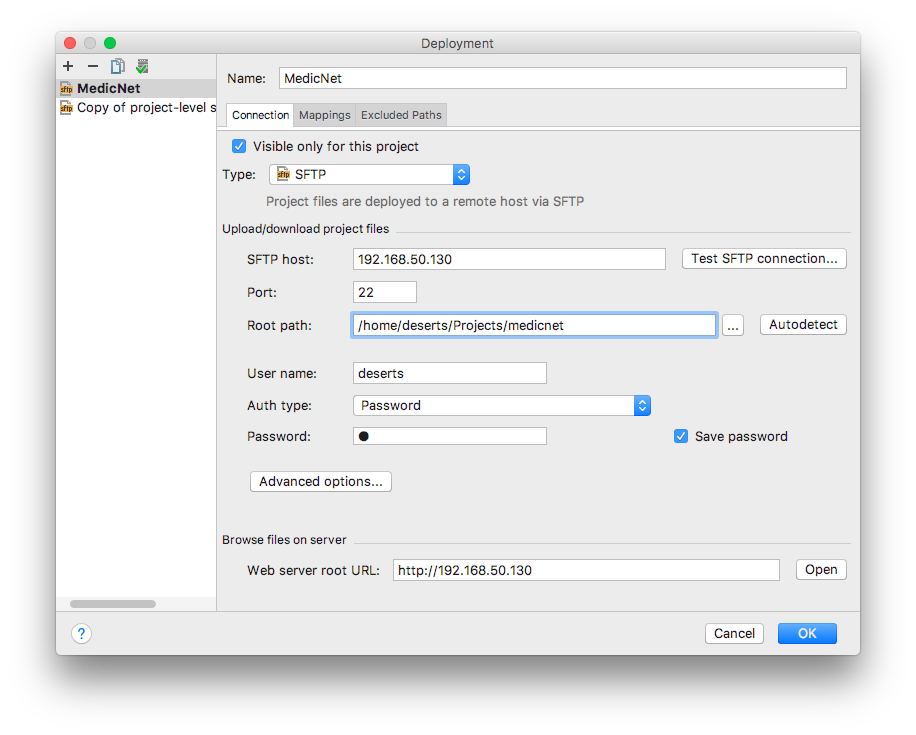
- 文件同步:Tools -> deployment -> configuration,按照下图配置:
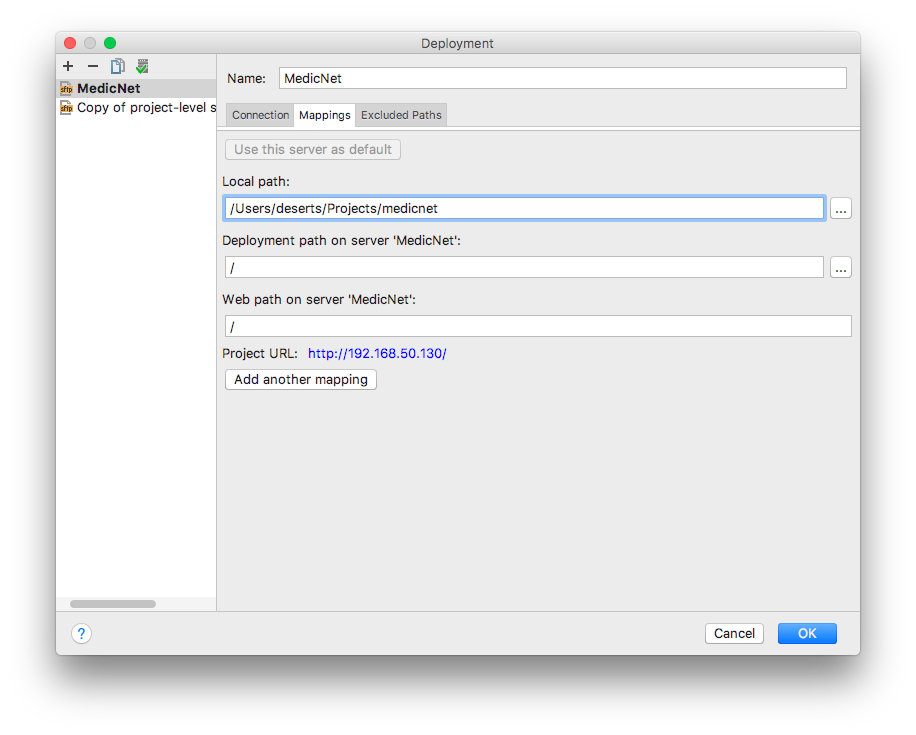
设置路径映射,注意部署路径基于上图的ROOT路径设定。
- 勾选 Tools -> deployment -> Automatic upload,即可自动同步文件。
PyCharm按照以上流程设置好以后,可以在右侧边栏打开远程文件浏览,手工进行文件操作。如果需要更丰富的远程文件管理,可以借助上篇提及的Samba映射网络驱动器。或者使用其他SFTP工具。
至于更复杂的网络拓扑,可以使用路由器的端口映射功能实现广域网(或校内网)访问。
至此,可以优雅的使用远程机器进行深度学习开发。